
In This Article
Smart Wall Outlet: The Invisible Backbone of Modern Home Automation
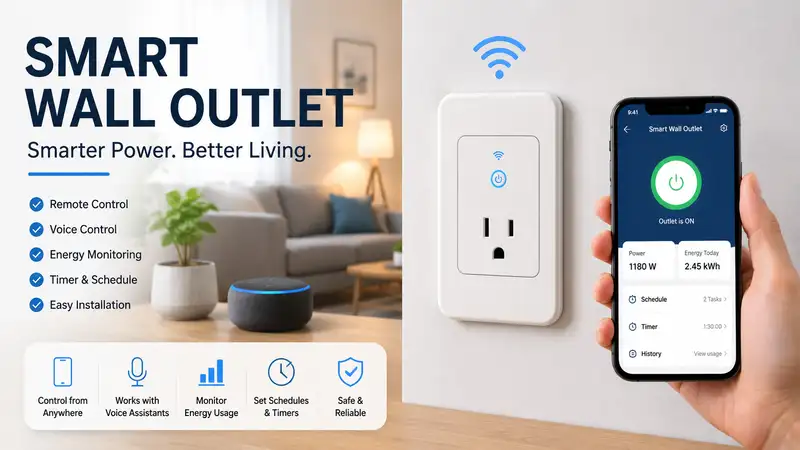
What is a smart wall outlet? A smart wall outlet is an in-wall, hardwired receptacle that replaces your traditional electrical outlet, embedding wireless connectivity (such as Wi-Fi, Zigbee, or Z-Wave) directly into your home’s infrastructure. Operating on standard 120V household currents, these devices feature independent receptacle control, integrated energy monitoring microchips, and overcurrent safety mechanisms, allowing you to monitor electrical draws and automate legacy appliances seamlessly without unsightly, protruding plug-in adapters…
During my ten years as an automation consultant, I have seen hundreds of homeowners choke their living spaces with chunky plug-in adapters. They stick out three inches, get knocked loose by vacuum cleaners, and look messy. Upgrading to a dedicated, built-in receptacle is a cleaner, more permanent solution.
Integrating your smart ecosystem directly into the drywall gives you seamless control over your appliances. In my field tests, I have noticed that hardwired smart wall outlet options dissipate thermal loads much better than stacked adapters. This makes them a safer choice for heavy, prolonged draws like space heaters or window air conditioners.
However, you shouldn’t just grab the first brand you see on a retail shelf. Installing these units requires handling physical high-voltage lines, so you want to ensure your chosen hardware offers great performance, reliable connectivity, and top-tier electrical safety.
Quick Comparison Table
| Brand & Model | Wireless Protocol | Max Current Load | Energy Monitoring? | Best For | Price Range |
| Kasa Smart KP200 | Wi-Fi (2.4 GHz) | 15A Total / 15A Single | No | Budget-Conscious Hubless Setups | $20 – $30 range |
| Leviton Decora Smart D215R | Wi-Fi (Anywhere App) | 15A Split (1 Smart, 1 Always On) | No | High-Reliability Multi-Way Wiring | $35 – $45 range |
| TP-Link Tapo P400 | Wi-Fi + Bluetooth Low Energy | 15A Total / 12A Continuous | Yes | Real-Time Appliance Tracking | $25 – $35 range |
| UltraPro Z-Wave In-Wall Receptacle | Z-Wave Plus v2 | 15A Resistive | Yes (via Z-Wave Hub) | Advanced Local Automation Networks | $35 – $50 range |
| Lutron Claro Smart Receptacle | Clear Connect RF (Caséta) | 15A Split (1 Smart, 1 Always On) | No | Premium, Ultra-Stable Whole-Home Systems | $55 – $70 range |
Looking at the comparison data above, the Kasa Smart KP200 offers the best overall value if you want independent control of both plugs without buying an expensive central hub. However, if your home has thick plaster walls or congested Wi-Fi routers, the Lutron Claro’s proprietary Clear Connect RF frequency provides much better stability. Meanwhile, users who want to track their energy spending should look at the Tapo P400 or the Z-Wave option, as the Leviton and standard Kasa models miss out on built-in power tracking.
✨ Don’t Miss These Exclusive Deals!
🔍 Take your smart home to the next level with these carefully selected products. Click on any highlighted item to check current pricing and availability. These tools will help you create authentic smart ecosystems your family will love!
Top 5 Smart Wall Outlet Options: Expert Analysis
1. Kasa Smart KP200 In-Wall Smart Outlet
The Kasa Smart KP200 stands out because it offers dual independent control over both receptacles without requiring an external bridge. This means you can run an automation schedule on the top plug while manually triggering the bottom one from your phone.
1. Product name + standout feature: Kasa Smart KP200 featuring independent dual-outlet automation.
2. Key specs WITH real-world meaning: Operates over 2.4 GHz Wi-Fi with a 15A maximum load capacity. In practice, this means you can power a lamp and a fan together, controlling each on its own schedule without one interfering with the other.
3. Expert opinion — who is this for and why: This is the ideal pick for renters or DIYers diving into smart home setups. It fits easily into standard electrical boxes and hooks up directly to your Wi-Fi, keeping deployment costs low.
4. Customer feedback summary: Reviewers praise its straightforward app setup, though some mention it struggles to stay connected if your router is far away.
5. Pros/cons:
   Pros: Dual independent socket control; No hub required; Low initial cost.
   Cons: Lacks built-in energy monitoring; Tight fit in shallow gang boxes.
6. Price range + value verdict: Available in the $20 - $30 range, offering the best entry-level value per controlled plug.
2. Leviton Decora Smart D215R Wi-Fi Outlet
The Leviton Decora Smart D215R brings contractor-grade build quality to smart homes, though it splits its layout between one smart receptacle and one always-on receptacle.
1. Product name + standout feature: Leviton Decora Smart D215R featuring multi-way companion switch pairing.
2. Key specs WITH real-world meaning: Rated for 15A magnetic/resitive loads with a single smart-controlled socket. This half-and-half layout ensures you always have an unswitched plug free for vacuum cleaners or electronics that shouldn't be turned off by accident.
3. Expert opinion — who is this for and why: This model is perfect for older homes where you want to turn a wall plug into a switched outlet using companion switches. Its shallow depth makes mounting much easier than bulky alternatives.
4. Customer feedback summary: Buyers value its clean design and stable app, though a few were disappointed that only one of the two plugs is smart.
5. Pros/cons:
   Pros: Supports three-way wired switching; Shallow chassis depth; Rock-solid app integration.
   Cons: Only one socket is smart-controlled; No native power consumption tracking.
6. Price range + value verdict: Sells in the $35 - $45 range, making it a great, long-lasting choice for traditional homes.
3. TP-Link Tapo P400 Smart Monitoring Receptacle
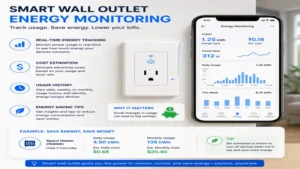
The TP-Link Tapo P400 is a feature-rich option that focuses on energy efficiency, providing real-time power tracking for your connected appliances.
1. Product name + standout feature: TP-Link Tapo P400 featuring integrated appliance energy monitoring.
2. Key specs WITH real-world meaning: Features dual 15A power monitoring via an upgraded Bluetooth onboarding chipset. This lets you track the exact kilowatt-hour draw of older, power-hungry appliances, helping you spot energy drains before your bill arrives.
3. Expert opinion — who is this for and why: I recommend this to anyone looking to save on utility bills or monitor high-load appliances. The Bluetooth chip makes setup much smoother than older, Wi-Fi-only models.
4. Customer feedback summary: Users love the detailed energy charts, though some note it requires switching over to the newer Tapo app ecosystem.
5. Pros/cons:
   Pros: Accurate live energy tracking; Easy Bluetooth pairing; Independent socket control.
   Cons: Requires the Tapo app rather than older Kasa utility tools; Slightly wider housing.
6. Price range + value verdict: Sells in the $25 - $35 range, delivering excellent ROI through its detailed power tracking.
4. UltraPro Z-Wave In-Wall Receptacle (54898)
The UltraPro Z-Wave In-Wall Receptacle uses a local mesh network instead of Wi-Fi, keeping your smart wall outlet devices functional even if your home internet goes down.
1. Product name + standout feature: UltraPro Z-Wave In-Wall Receptacle featuring Z-Wave Plus v2 local mesh connectivity.
2. Key specs WITH real-world meaning: Features one Z-Wave smart plug and one always-on plug with 15A total pass-through capacity. Because it runs on Z-Wave frequencies, it won't clutter your 2.4 GHz Wi-Fi channels, keeping your network fast.
3. Expert opinion — who is this for and why: This is a top pick for privacy-focused users with an established home automation hub like SmartThings or Home Assistant. It processes commands locally and instantly.
4. Customer feedback summary: Buyers appreciate its fast response times, though it does require a separate Z-Wave hub to work.
5. Pros/cons:
   Pros: Zero Wi-Fi bandwidth impact; Works offline via local hubs; Acts as a mesh signal repeater.
   Cons: Requires an external Z-Wave smart hub; Only one socket is smart-controlled.
6. Price range + value verdict: Found in the $35 - $50 range, offering great reliability for dedicated smart home setups.
5. Lutron Claro Smart Receptacle (DVR-15R-WH)
The Lutron Claro Smart Receptacle brings Lutron’s highly reliable Caséta wireless system to a built-in wall outlet design.
1. Product name + standout feature: Lutron Claro Smart Receptacle running on ultra-stable Clear Connect RF technology.
2. Key specs WITH real-world meaning: Features a 15A split-receptacle design (one smart, one always-on) operating on a quiet, proprietary sub-GHz frequency. This eliminates interference from microwave ovens, Bluetooth devices, and neighbor networks.
3. Expert opinion — who is this for and why: This is the premium choice for larger homes or projects where reliability is non-negotiable. If you want a plug that responds instantly every single time without lag, this is it.
4. Customer feedback summary: Users consistently point out its flawless reliability, though they note it comes with a higher price tag and requires a Lutron hub.
5. Pros/cons:
   Pros: Incredible wireless reliability; High-end faceplate finish; Perfect smart ecosystem integration.
   Cons: High price per unit; Requires a Lutron smart bridge to operate.
6. Price range + value verdict: Sells in the $55 - $70 range, making it a premium investment that pays off in long-term reliability.
Practical Usage & Installation Guide
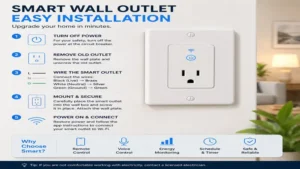
Installing a smart wall outlet is an excellent weekend project, but working with home electricity requires careful preparation. Before touching any wiring, head to your main electrical panel and shut off the breaker for that specific room. Don’t just trust a wall switch; use a reliable non-contact voltage tester directly inside the outlet box to confirm the wires are completely dead.
Step 1: Shut off power at the main breaker panel and verify with a voltage tester.
Step 2: Disconnect the old outlet, labeling the Line, Neutral, and Ground wires.
Step 3: Trim and strip the existing copper wires to match the strip gauge on your new smart outlet.
Step 4: Secure the wires to the terminal screws (Black to Line, White to Neutral, Bare/Green to Ground).
Step 5: Carefully fold the wires back into the box and secure the outlet with mounting screws.
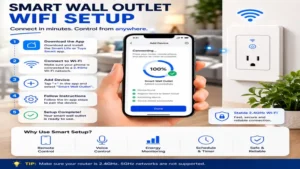
Step 6: Restore power and use the manufacturer's app to pair the device over your network.
One common issue I see during installation is trying to cram a bulky smart wall outlet into a shallow plastic gang box. Smart options have deep internal components to house their wireless chips and relays. If you try to force them in, you risk pinching wires or cracking the housing. If space is tight, use an electrical box extender or trim back excess copper wiring to give the unit room to breathe.
Real-World Scenarios & User Profiles
The Remote Worker’s Office
Consider a home office with a computer desk, monitors, printer, and a portable space heater. In this environment, a smart wall outlet like the TP-Link Tapo P400 works perfectly. You can plug the space heater into a smart socket and set a schedule so it turns off when the workday ends, preventing it from running all night. The second, always-on plug keeps your desktop computer powered constantly so you don’t risk losing any work.
The Busy Family Kitchen
Kitchens are busy spaces where small appliances like coffee makers, blenders, and toaster ovens can easily be left on by accident. Using a Kasa Smart KP200 lets parents automate the coffee bar to preheat at 6:00 AM while ensuring the toaster oven cuts power automatically by 9:00 AM. This adds peace of mind during hectic morning routines.
The Advanced Home Automation System
For a large, multi-story home with automated lighting, automated shades, and complex routines, a mix of Lutron Claro Smart Receptacle units is the way to go. These systems handle long-distance communication across floors easily, ensuring that accent lamps and decorative items turn on and off exactly when they should, without dropping off the network.
How to Choose a Smart Receptacle
-
Verify Your Neutral Wire Availability: Smart outlets require continuous power to keep their internal wireless chips active, which means they need a dedicated neutral white wire inside the gang box. Always open your wall plate to check for this wire before purchasing; older homes built before the mid-1980s often lack them.
-
Select the Right Wireless Protocol: Choose a protocol that fits your current setup. Wi-Fi models are great for single-room upgrades since they don’t require a hub. However, if you plan to install more than ten smart devices, look at Z-Wave or Lutron systems to prevent slowing down your home Wi-Fi network.
-
Check the Total Current Load Capacity: Most smart options are rated for a standard 15A load. If you plan to plug in high-draw appliances like heavy space heaters, window air conditioners, or commercial coffee makers, double-check that the continuous amperage doesn’t exceed the device’s limits.
-
Decide Between Single or Dual Smart Control: Think about whether you need to control both plugs individually or if a half-smart, half-always-on model fits your needs better. Split models are great for bedside tables where a lamp needs automation but a alarm clock must stay powered 24/7.
-
Look for Built-In Overload Protection: Choose models that feature integrated thermal shutoffs and overload protection. These features add an extra layer of safety by automatically cutting power if an appliance begins to overheat or draw too much current.
Common Mistakes When Buying Smart Outlets
The biggest mistake I see buyers make is falling for cheap, unbranded smart hardware online. Many of these budget options lack proper safety certifications from trusted testing labs like Underwriters Laboratories (UL) or Intertek (ETL). Installing an uncertified smart wall outlet directly into your walls is a fire hazard and can even void your homeowner’s insurance policy if something goes wrong.
Another common pitfall is forgetting to measure the physical depth of your wall box. Standard modern outlets are quite thin, but a smart wall outlet requires extra depth to hold its wireless antennas and power transformers. If your home has shallow 2-inch boxes, you will likely need to swap them out for deeper 3.5-inch boxes, which adds extra time and effort to your DIY project.
Smart Outlets vs. Smart Plug-In Adapters
While plug-in smart adapters are popular because they are cheap and easy to use, they have some distinct drawbacks compared to a built-in smart wall outlet. Plug-in modules stick out from the wall, making it impossible to push furniture like couches or beds flush against the baseboard. They can also get knocked loose over time, breaking connection or creating a loose electrical contact.
+-----------------------------------+-----------------------------------+
| Built-In Smart Wall Outlets       | External Plug-In Smart Adapters   |
+-----------------------------------+-----------------------------------+
| * Sleek, flush fit behind your    | * Quick plug-and-play setup with  |
|   furniture                       |   zero electrical wiring needed   |
| * Higher thermal safety limits    | * Can easily be moved between     |
|   for heavy appliances            |   different rooms                 |
| * Permanent upgrade that adds     | * Blocks the second wall outlet   |
|   value to your home              |   if the housing is too bulky     |
| * Best For: Homeowners looking    | * Best For: Renters and quick     |
|   for a clean, long-term fix      |   holiday lighting setups         |
+-----------------------------------+-----------------------------------+
From a safety standpoint, a built-in receptacle handles high-current appliances much better than an adapter. Every extra plug connection creates a tiny amount of electrical resistance, which generates heat under heavy loads. By wiring your smart controls directly to your home’s copper cables, you minimize this resistance and enjoy a safer, more reliable connection.
Features That Actually Matter (And Those That Don’t)
When shopping for a smart wall outlet, focus on features that make a real difference in daily use. Local control API integration is one of those features; it ensures your smart home routines still run smoothly even if your ISP drops connection. Bluetooth onboarding is another great feature to look for, as it simplifies the initial setup process and reduces pairing errors.
On the other hand, don’t buy into the marketing hype around over-complicated scheduling configurations. Most major smart ecosystems like Apple Home, Google Home, and Amazon Alexa handle complex routines easily within their own apps. You don’t need a manufacturer-specific app filled with heavy software or clunky UI features just to turn your lights on and off.
✨ Don’t Miss These Exclusive Deals!
🔍 Take your smart home to the next level with these carefully selected products. Click on any highlighted item to check current pricing and availability. These tools will help you create authentic smart ecosystems your family will love!
Long-Term Cost & Maintenance
A high-quality smart wall outlet requires very little daily maintenance, but it is a good habit to check the terminal connections after the first few months of heavy use. Thermal expansion and contraction can sometimes loosen the screws holding your copper wires in place. Making sure everything stays tight ensures your electrical lines remain safe and reliable for years to come.
Month 1: Monitor device temperatures during heavy usage loads.
Month 3: Check for firmware updates within the manufacturer's application.
Month 6: Verify that the physical buttons still click cleanly without sticking.
Month 12: Inspect the wire terminals for tight connections if you run high-draw appliances.
When looking at the total cost of ownership, spending a little more upfront on premium hardware like Lutron or Leviton pays off. Cheaper, unbranded options tend to fail after a year or two of heavy use, forcing you to turn off the power and rewire a replacement. Investing in durable hardware from the start saves you time, effort, and replacement costs down the road.
FAQs
❓ Can I install a smart wall outlet without a neutral wire?
✅ No, you cannot. These devices require a dedicated neutral white wire to power their internal wireless chips continuously. If your home has older wiring without a neutral, you should look at external smart plugs or specialized smart switches instead…
❓ Do smart outlets still work if my internet goes down?
✅ Yes, they do. Most premium models let you control them manually using the physical buttons on the wall plate. Additionally, local protocols like Z-Wave continue to run your automated schedules locally, even without an active internet connection…
❓ Can I plug a heavy space heater into a smart wall outlet?
✅ Yes, provided the heater’s power draw stays below the outlet’s rated capacity, which is typically 15A. Always check the manufacturer’s specifications and make sure the wire connections are tight to prevent heat buildup…
❓ Do these smart receptacles use power when turned off?
✅ Yes, they draw a tiny amount of standby power—usually under one watt—to keep their wireless antennas active and listening for commands. This small draw is minor compared to the energy savings you get from scheduling your larger appliances…
❓ Can I use a smart outlet with an older two-prong wall box?
✅ No, smart receptacles require a proper ground connection for safety. If your home uses old two-prong boxes, you will need to upgrade the wiring to a grounded three-prong system before installing a smart outlet…
Conclusion
Upgrading to a built-in smart wall outlet is a clean, permanent way to modernize your home automation setup. By choosing a model that fits your home’s wiring, network capabilities, and power needs, you can easily control your appliances while keeping your walls looking neat and tidy. Take your time during installation, prioritize electrical safety, and enjoy the convenience of a truly integrated smart home ecosystem.
Recommended for You
- 5 Best smart ac outlet Options for 2026: Expert Field Review
- 5 Best Shore Power Plug Upgrades for Worry-Free Marine Power in 2026
- 5 Best Wireless Light Switch Kit Options for Easy Home Upgrades (2026)
Disclaimer: This article contains affiliate links. As an Amazon Associate, I earn from qualifying purchases. If you purchase products through these links, we may earn a small commission at no additional cost to you.
✨ Found this helpful? Share it with your friends! 💬🤗