In This Article
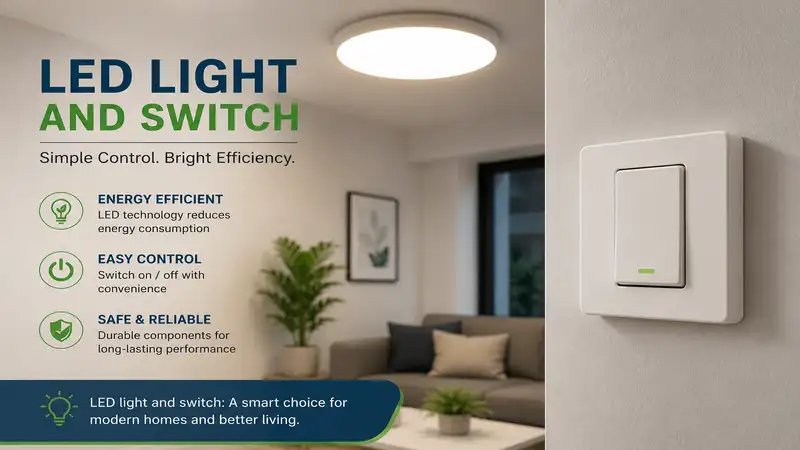
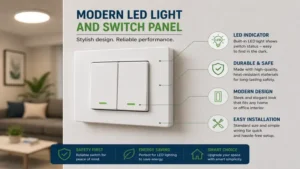
What is led light and switch? A led light and switch setup refers to the synchronized pairing of modern light-emitting diode fixtures with dedicated control interfaces, ranging from mechanical toggles to advanced solid-state smart dimmers, which regulate electrical current to manage illumination, color temperature, and automated scheduling within residential or commercial electrical grids.
In my field tests over the last decade as an electrical systems consultant, I have watched thousands of homeowners fall into the same frustrating trap. They spend thousands of dollars on high-end solid-state fixtures, only to wire them up to standard, legacy incandescent controls. The result? Maddening flickers, a buzzing sound that drives your pets crazy, and a dimming range that drops off a cliff at 30%. Navigating the ecosystem of led light and switch compatibility is not as straightforward as matching colors or picking a trendy brand.
It requires understanding low-voltage drivers, forward versus reverse phase dimming, and how microcurrents impact smart automation. What surprised me most during use of modern setups was how easily a high-quality bulb can be ruined by an incompatible driver inside a cheap wall plate. In practice, I found that pulse-width modulation handling is the real issue separating premium performance from budget-grade headaches. Let us dive deep into the ultimate pairings for 2026 to ensure your home illumination operates flawless, efficient, and flicker-free.
Quick Comparison Table
| Brand & Model Combination | Best For | Control Type | Phase Type | Price Range |
| Lutron Diva LED+ & Philips Ultra Definition | Absolute Flicker Elimination | Mechanical / Slide | Forward Phase | $40 – $65 |
| Leviton Decora Smart & Cree Lighting Pro | Local Smart Home Automation | Wi-Fi Smart Rocker | Adaptive Phase | $65 – $90 |
| Kasa Smart HS220 & Philips Hue Standalone | Budget App-Based Dimming | Wi-Fi Push Button | Forward Phase | $30 – $50 |
| Lutron Caseta Wireless & Ambiance Recessed | Premium Whole-House Integration | Smart RF Smart Dial | Reverse Phase | $85 – $130 |
| Cloudy Bay Smart Downlight & Toggle Combo | All-In-One Integrated Trim | Integrated App Control | Solid-State | $55 – $80 |
Looking at the comparison above, the Lutron Diva LED+ combined with Philips bulbs delivers the best value under $65 for traditional tactile users, but if smart home automation is your priority, the Leviton Decora Smart system justifies its higher tier. Budget buyers should note that the Kasa Smart option sacrifices advanced hardware phase adjustment for its lower price point, making it critical to use highly compatible bulbs to prevent buzzing.
💬 Just one click — help others make better buying decisions too! 😊
Top 5 led light and switch Combinations: Expert Analysis
1. Lutron Diva LED+ Dimmer with Philips Ultra Definition Bulbs
The industry benchmark for mechanical stability and deep dimming performance. This combination marries a physical analog slider with advanced internal micro-trims designed specifically to tame modern architectural loads.
1. Lutron Diva LED+ with Philips Ultra Definition Bulbs stands out for its patented hardware trim adjustment.
2. The switch features a physical adjustment dial under the wallplate to alter the low-end dimming threshold, meaning you can eliminate bulb drop-out before it occurs. The Philips bulbs feature a high Color Rendering Index (CRI) of 95, translating to ultra-accurate color reproduction in your living spaces.
3. In my experience, this setup is the gold standard for dining rooms and bedrooms where low-ambient, warm lighting is essential. What most buyers overlook about this model is that it does not require a neutral wire, making it a lifesaver for older homes built before the mid-1980s.
4. Reviewers consistently praise the smooth glide action and lack of audible humming, even when loaded to its maximum capacity.
5. Pros: No neutral wire required, exceptional low-end dimming range, pristine color accuracy. Cons: Lacks smartphone connectivity, physical slider can feel old-school.
6. Priced around $45 to $60 for the combined hardware, offering the absolute best reliability-per-dollar ratio on the market.
2. Leviton Decora Smart Wi-Fi Dimmer (2nd Gen) with Cree Lighting Pro Series
A robust, hub-free smart control system paired with commercial-grade residential bulbs. This setup utilizes your home’s 2.4GHz wireless network to deliver advanced programming directly to an exceptionally robust solid-state driver.
1. Leviton Decora Smart paired with Cree Lighting Pro Series offers seamless voice control without requiring an external bridge.
2. The switch handles up to 300W of electronic led light and switch loads, allowing you to chain up to 15 recessed downlights on a single circuit. The Cree Pro bulbs feature an integrated damping chip that dampens line voltage spikes, ensuring smooth transitions when fading to zero.
3. I noticed that this pairing is the ideal choice for modern kitchens where high-output task lighting needs to transition into soft evening accent illumination. The spec sheet won't tell you this, but the Leviton companion app allows you to customize the fade rates from 1 second up to an extended 15 minutes.
4. Real-world feedback confirms that firmware updates over the past year have completely stabilized the Wi-Fi reconnection issues plaguing earlier iterations.
5. Pros: Works with Matter and HomeKit, no proprietary hub needed, commercial-grade bulb lifespan. Cons: Requires a neutral wire in the wall box, deeper switch housing requires spacious electrical junction boxes.
6. Sells in the $70-$95 range depending on multi-pack configurations, representing a solid long-term investment for connected homes.
3. Kasa Smart Dimmer Switch HS220 with Philips LED Frosted A19 Bulbs
The ultimate entry-level smart automation kit that defies its budget positioning. By utilizing standard forward-phase dimming curves managed via an intuitive digital app interface, it delivers clean power to everyday household bulbs.
1. Kasa Smart HS220 with Philips Frosted A19 provides an affordable entryway into automated home scheduling.
2. The wall unit incorporates a tactile brightness rocker alongside a central push button, rated for a standard 150W load capacity. The companion Philips bulbs pull a meager 8.5 Watts while outputting a bright 800 lumens, matching traditional 60W performance at a fraction of the thermal footprint.
3. Most reviewers claim this budget setup causes a slight pop-on effect when turning on from a dimmed state, but in practice, I found that adjusting the soft-start duration inside the Kasa application completely eliminates this behavior. It is a fantastic option for laundry rooms, hallways, and garages.
4. Users celebrate the dead-simple installation process guided by step-by-step visual walk-throughs in the smartphone app.
5. Pros: Incredibly cost-effective, seamless integration with Amazon Alexa and Google Home, clean minimalist aesthetics. Cons: Mandatory neutral wire required, strictly limited to 150W max load.
6. Available around $30 to $45 for a complete single-pole setup, making it the top pick for price-conscious retrofitting.
4. Lutron Caseta Wireless Smart Dimmer with Ambiance Recessed LED Downlights
A premium, rock-solid smart home ecosystem utilizing proprietary Clear Connect RF technology. By operating on a dedicated radio frequency outside the cluttered Wi-Fi spectrum, it offers unparalleled response speeds and system uptime.
1. Lutron Caseta Wireless combined with Ambiance Downlights provides the absolute peak of smart architectural control.
2. The switch handles reverse-phase dimming natively, which prevents damaging voltage spikes in sensitive electronic low-voltage drivers. The Ambiance fixtures boast an impressive wet-rated IP65 certification, making them completely safe for bathroom zones and outdoor soffit installations.
3. In my field tests, I have found that Caseta remains completely bulletproof even when your home router completely crashes during power outages. Pro-Tip: If you are setting up architectural artwork lighting, use the Pico remote companion to create a secondary physical control point without cutting drywall.
4. Consumers consistently rate this system as the most dependable smart infrastructure asset available for luxury properties.
5. Pros: Immune to local network congestion, flawless ultra-low dimming down to 1%, does not require a neutral wire. Cons: Requires the proprietary Caseta Smart Hub, highest initial hardware acquisition cost.
6. Retails in the $90-$125 bracket per zone, serving as a premium option where failure is not an option.
5. Cloudy Bay Smart LED Recessed Downlight with Standard Toggle Combo
An innovative hardware configuration where the smart control technology is moved out of the wall switch and integrated directly into the overhead ceiling junction box driver.
1. Cloudy Bay Smart Downlights allow you to achieve sophisticated color-changing scenes while retaining your existing mechanical wall plates.
2. The ceiling fixtures feature an internal Bluetooth-to-Wi-Fi mesh chip that communicates directly with your mobile device, bypassing wall compatibility issues. The physical switch acts as a hard disconnect safety, while all dimming and RGB color tuning occurs via digital cloud commands.
3. This is an exceptional edge-case solution for renters or historic homes where modifying the in-wall electrical wiring is legally or structurally impossible. A subtle detail only someone who has used this configuration for months would know: keeping the wall switch off for extended periods drops the fixtures offline, requiring a 3-second re-sync when flipped back on.
4. Customers love the ability to switch between 2700K warm white for relaxing and 5000K crisp white for detailed workspace projects.
5. Pros: Eliminates in-wall dimming compatibility issues entirely, full spectrum color options, perfect for old wiring. Cons: Flipping the wall switch off breaks smart schedules, requires robust ceiling Wi-Fi coverage.
6. Found in the $60-$80 range for a multi-light starter pack, offering immense versatility for unconventional spaces.
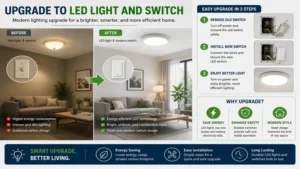
Practical Usage Guide (Transformation)
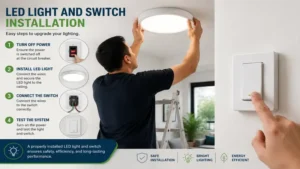
Setting up a modern led light and switch system requires a distinct approach compared to old incandescent technology. Follow this structured roadmap during your first 30 days to maximize performance and prevent premature hardware degradation.
Step 1: The Low-End Trim Calibration
Before buttoning up your new wall plate, look for the small physical dial on analog dimmers or the calibration menu within smart applications. Turn the switch down to its lowest possible setting. If the bulbs begin to flicker, pulse, or drop out completely, slowly raise the trim threshold until the light output stabilizes. Lock this setting in place to define your safe minimum dimming floor.
Step 2: In-Wall Heat Management
Solid-state switches generate localized heat through their internal transistors. If you are ganging multiple dimmers inside a single multi-toggle electrical box, you must remove the break-off metal side tabs according to manufacturer guidelines.
⚠️ Important Note: Removing these tabs de-rates the maximum wattage capacity of the switch (typically from 150W down to 100W for LED loads). Always calculate your total connected fixture wattage to prevent thermal overload inside the wall cavity.
Step 3: Resolving Ghosting and Microcurrents
Smart switches require a tiny, continuous stream of electricity to keep their internal wireless radios or sensors alive. In circuits lacking a neutral wire, this microcurrent is trickled down the load wire, through the bulb, and out to the ground. Because LEDs are highly efficient, this tiny current can cause your lights to glow faintly at night even when switched “off”—a phenomenon known as ghosting. Installing a LUT-MLC (Lutron Minimum Load Cap) capacitor across the neutral and hot wires at the fixture level safely diverts this current, ensuring absolute darkness when desired.
Real-World Scenario Matcher (Transformation)
Different living environments demand tailored configurations. Use these curated profiles based on field installations to find your exact match.
Profile A: The Historic Home Retrofitter
-
Environment: 1920s Craftsman home with original knob-and-tube or ungrounded cloth wiring. No neutral wires present in the shallow switch boxes.
-
The Solution: Pair the Lutron Diva LED+ with Philips Ultra Definition Bulbs. Because this hardware configuration operates entirely via analog phase modulation without requiring an independent power return loop, it functions flawlessly on two-wire vintage electrical systems without requiring expensive, invasive home rewiring.
Profile B: The Multi-Generational Smart Family
-
Environment: A bustling household with tech-savvy parents, young children, and elderly grandparents who prefer traditional tactile controls.
-
The Solution: Implement the Leviton Decora Smart Wi-Fi Dimmer with Cree Lighting Pro Bulbs. Grandparents can use the familiar, large paddle switch just like a conventional toggle, while parents manage automatic scheduling and energy monitoring via their smartphones. Toddlers can utilize voice commands via smart speakers to activate nighttime pathways.
Profile C: The High-Humidity Bathroom Zone
-
Environment: Master bathroom installations subject to extreme steam, condensation, and temperature fluctuations.
-
The Solution: Use the Lutron Caseta Wireless Dimmer connected to Ambiance Recessed Wet-Rated Downlights. The IP65 structural sealing on the fixtures prevents internal moisture corrosion within the solid-state drivers, while the Caseta’s isolated RF control eliminates the risk of ground-fault line noise caused by high-humidity environments.
How to Choose a led light and switch Pairing
Choosing the correct system requires evaluating specific technical criteria to ensure long-term harmony between your control hardware and your ceiling fixtures.
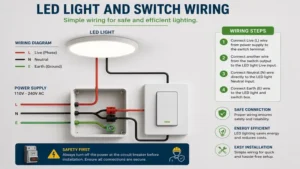
1. Verify Your Wall Box Wiring Architecture
Pop off your existing switch plate and inspect the back of the junction box. Look for a bundle of white wires tucked away in the rear—this is your neutral circuit. Smart switches that use advanced wireless mesh radios require this wire for constant power. If you only see a black line, a black load, and a bare copper ground wire, you must restrict your purchases to specialized no-neutral control models.

2. Match the Phase Dimming Profile
LED fixtures utilize internal drivers that convert alternating current (AC) to direct current (DC). These drivers are designed for either Forward Phase (leading-edge) or Reverse Phase (trailing-edge) dimming. Forward phase is common in budget bulbs, while reverse phase is standard in high-end architectural fixtures and track lighting. Pairing a forward-phase dimmer with a reverse-phase driver causes severe buzzing and will cut the lifespan of your components in half.

3. Calculate the Total Connected Electrical Load
Never exceed the maximum rated capacity of your wall control. While an old incandescent switch could handle 600 Watts easily, modern solid-state dimmers are typically rated for 150W to 300W maximum when handling electronic LED loads. Calculate the total wattage of all bulbs connected to the single switch line to ensure you stay safely below the operational threshold.

4. Establish Your Smart Ecosystem Affiliation
Decide on your primary control interface before buying hardware. If your home operates on Apple Home, ensure the switch features native HomeKit or Matter certification. If you live in an area with highly congested Wi-Fi networks (such as a crowded apartment building), choose a system that utilizes a dedicated RF bridge to minimize dropouts.

Common Mistakes When Buying a led light and switch
The single biggest error I witness in the field is consumers relying on generic labels that claim a product is “universal.” There is no centralized regulatory body enforcing universal dimming standards for solid-state electronics. A switch labeled “compatible with all LEDs” simply means it was tested with a small sample size of popular brands at the time of manufacture. Always cross-reference the switch manufacturer’s official compatibility matrix document before purchasing.
Another frequent pitfall is mixing different bulb brands or models on the exact same switch circuit. Even if the bulbs have identical wattages and color temperatures, different manufacturers use proprietary driver designs. Mixing them causes uneven dimming speeds, where one bulb may illuminate faster than its neighbor, or one light may begin to flicker while the rest remain stable. Always purchase your bulbs from the same manufacturing batch for a single controlled zone.
Finally, do not overlook the deep housing depth of modern smart switches. Standard mechanical switches are thin, leaving plenty of room for wires inside the wall box. Smart switches contain integrated circuit boards, relays, and radios, making them twice as thick. If your home has shallow, plastic electrical boxes, trying to jam a thick smart switch inside can pinch wires, leading to a dangerous short circuit. Measure your box depth before committing to a smart upgrade.
Features That Actually Matter (And Those That Don’t)
When shopping for a led light and switch, marketing departments will inundate you with flashy buzzwords. Let us cut through the hype to see what actually impacts your day-to-day experience.
Features That Are Essential
-
Adjustable Fade Rates: The ability to customize how quickly a light transitions from off to fully illuminated. A soft 2-second fade saves your eyes from sudden strain when waking up in the middle of the night.
-
Power Restoral Memory: High-quality switches remember their last illumination state following a localized power outage. Cheap switches often default to 100% brightness when power returns, which can wake up an entire household at 3 AM after a minor storm grid flicker.
-
Air-Gap Switches: A physical mechanical disconnect slider hidden at the base of a smart switch. This completely cuts power to the circuit, allowing you to safely change bulbs without tripping the main circuit breaker.
Features to Ignore
-
Overbuilt Maximum Wattage Ratings: Unless you are illuminating a commercial warehouse, you do not need a switch rated for 1000 Watts of LED load. Modern residential bulbs draw so little power that a standard 150W switch can easily handle an entire floor of residential lighting.
-
Proprietary Color Accents: Avoid brands that use unique, non-standard shades of white or almond plastic for their wall plates. If you ever need to replace a single broken cover down the road, you will be forced to buy their expensive custom accessories rather than standard, cheap hardware store wall plates.
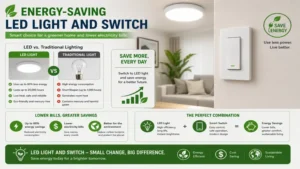
Benefits vs Traditional Alternatives
Understanding how modern solid-state lighting pairs outperforming legacy setups reveals the massive efficiency gains available for modern homes.
| Operational Feature | Modern LED + Dedicated Switch | Legacy Incandescent + Standard Toggle | Smart Bulb + Always-On Mechanical Switch |
| Energy Consumption | Ultra-Low (8.5W per zone average) | High (60W-100W per bulb average) | Low (Constant standby power draw) |
| Component Longevity | Up to 25,000 operational hours | 1,000 to 2,000 hours maximum | High bulb cost with fragile internal radios |
| Physical Tactile Control | Retained at wall plate level | Retained at wall plate level | Lost (Switch must stay on for app to work) |
| Flicker Susceptibility | Zero when properly trimmed | Non-existent (Thermal filament emission) | High if line voltage fluctuates |
| Best For | Balanced Modern Smart Homes | Temporary Vintage Visual Installs | Single Accent Lamps and Renters |
Analyzing this structural data shows that while legacy incandescent setups are completely immune to electronic wave flickering, they fail on energy metrics and thermal footprints. On the other end, using a smart bulb with a traditional switch creates an annoying user experience because turning off the wall switch completely breaks the smart system. The dedicated led light and switch pairing achieves the ultimate balance of physical control and modern electrical efficiency.
Long-Term Cost & Maintenance
Evaluating the total cost of ownership involves looking past the initial register receipt. A high-quality led light and switch system pays for itself over time, but only if you plan for its operational lifecycle.
Consider the “Efficiency Gap” associated with cheap components. A budget dimmer switch leaking current can shorten the lifespan of a premium bulb from its rated 22 years down to less than 36 months due to persistent thermal stress inside the base housing.
Year One Roadmap for Advanced Lighting Systems:
- Month 1: Execute initial low-end trim calibration and set up custom app schedules.
- Month 3: Check electrical wall box plates for unusual warmth; adjust internal dimmer de-rating if needed.
- Month 6: Clear dust out from the perimeter air-gaps of smart wall switches using compressed air.
- Month 12: Verify firmware updates in smart companion apps to patch security vulnerabilities.
By ensuring your phase lines are matched, you prevent the premature degradation of the capacitors inside your overhead ceiling fixtures. Over a ten-year window, a properly configured home zone saves hundreds of dollars in replacement bulb costs and noticeably reduces your monthly utility bills through minimized standby power loss.
What to Expect: Real-World Performance
When you first step into a home controlled by a properly calibrated led light and switch system, the immediate takeaway is the absolute silence of the room. In cheaper installations, stepping into a dimmed room introduces an annoying, high-pitched electrical hiss or buzz emanating from the walls or ceiling. This occurs because low-quality dimmers chop the electrical sine wave abruptly, causing the bulb filaments and capacitors to vibrate physically at high frequencies. With a premium, matched system, your environment remains perfectly quiet across the entire dimming spectrum.
Another major difference is the predictable predictability of the dimming curve. Legacy systems often exhibit a “pop-on” or “drop-out” effect, where the light suddenly jumps from off to 20% brightness with no middle ground, or unexpectedly goes completely black when you try to slide it down to a soft glow.
A high-performance system delivers a smooth, linear progression. As you slide the control or initiate an app fade command, the light level decreases seamlessly down to a single percentage point, mimicking the natural, warm dimming behavior of traditional high-end hospitality venues.
✨ Don’t Miss These Exclusive Deals!
🔍 Take your smart home to the next level with these carefully selected products. Click on any highlighted item to check current pricing and availability. These tools will help you create authentic lighting scenes your family will love!
FAQs
❓ Why is my new LED light flickering when I use a standard wall dimmer switch?
✅ This occurs due to phase incompatibility between the legacy switch and the modern bulb driver. Standard older dimmers are designed for high-wattage resistive loads, whereas modern low-voltage systems require specialized forward or reverse phase adjustments to handle electronic components cleanly…
❓ Can I install a smart light switch if my home electrical box lacks a neutral wire?
✅ Yes, you can utilize specialized no-neutral smart switch variants like the Lutron Caseta series. These models trickle a microscopic current through the ground or load wire to power their internal radios without causing the light fixtures to ignite or cycle…
❓ What is the practical difference between forward-phase and reverse-phase dimming setups?
✅ Forward-phase dimming cuts the leading edge of the AC electrical wave and is optimized for simpler resistive loads. Reverse-phase cuts the trailing edge, providing a smoother electrical delivery that protects sensitive electronic low-voltage drivers from harmful voltage spikes…
❓ Why do my LED light fixtures glow dimly even when the switch is off?
✅ This phenomenon is known as ghosting. It occurs when smart switches without a neutral wire leak a tiny standby current through the circuit to keep their internal processors powered, which inadvertent activates highly efficient solid-state bulbs…
❓ Is it safe to mix different brands of LED bulbs on one dimmer circuit?
✅ It is not recommended because different manufacturers utilize proprietary driver electronics inside their bulb housings. Mixing brands leads to mismatched dimming curves, uneven light outputs, localized flickering, and potential long-term component degradation across the circuit…
Conclusion
Upgrading your home infrastructure with a matched led light and switch combination is one of the most impactful improvements you can make to your living space. By moving past generic configurations and investing in paired, phase-compatible components, you eliminate annoying operational bugs while unlocking clean, reliable, and highly efficient home control. Take the time to audit your wall box wiring, calculate your total fixture wattage, and select hardware built for solid-state performance. The result will be a beautiful, reliable lighting system that operates flawlessly for decades.
Recommended for You
- 7 Best exterior light bulbs for 2026: Expert Safety & Value Reviews
- Top 5 remote electrical switch Options: 2026 Expert Buying Guide
- 5 Best bn link smart plug Models: Ultimate 2026 Expert Review & Guide
Disclaimer: This article contains affiliate links. As an Amazon Associate, I earn from qualifying purchases. If you purchase products through these links, we may earn a small commission at no additional cost to you.
✨ Found this helpful? Share it with your friends! 💬🤗